Jomon's CRX-R. Part 3 - The "Type R" Mechanical Transformation. VIDEO LIVE!
- Miguel - Newera
- May 12, 2020
- 10 min read
Updated: Oct 11, 2020
This is the point I’ll start getting a bit technical, so apologies are offered in advance. I hope some of this knowledge may be gold to Honda CR-X and other B-Series fans, as well as good for general knowledge that'll help you with your performance car of any brand.

As but one example – if you ever think of fitting early Integra Type R wheels to your Honda Civic, etc. & want Type R ’98 spec brakes to boot, or if you think of making your B-Series engined CR-X, I hope you’ll find a lot of useful knowledge in this section.

Quality damping is paramount in combination with equally important well-matched spring rates. Too much damping or the wrong spring rates for a given application can lead to reduced grip and control, so it pays to choose wisely. Not being able to adapt DC2 or EK9 Type R suspension for use on the CR-X, without resorting to chassis & structural modifications at the front & which would’ve made this car illegal for road use in Japan, I needed to find a more ready solution. There was only a meagre choice available for the CR-X, a car now over 30 years old. I chose Ohlins suspension, in conclusion. Not coil-overs, which were never produced in significant numbers for the EF CR-X & Civic models, but older C-ring type shocks, which on occasion appear for sale here in Japan without springs. And now I also needed springs that would provide a good match. I eventually found a rare Mugen set attached to EG6 Mugen shocks. Now - why would I choose older Ohlins shocks, instead of a new set of coil-overs such as those typically advertised by suppliers for seemingly good prices, you might ask? Experience & trust in the brand, if I'm totally honest. In comparison, most modern shocks or coil-overs of sensible price are likely to be made using lower-quality materials. There are top-shelf coil-overs for motorsports, but those would be overkill for this road CRX-R.
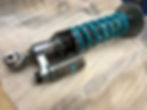
Having handled thousands of cars over the last 2 decades, I’ve seen so many leaky TEIN coil-overs that usually couldn’t be economically serviced. This has cemented the choice that I always prefer to avoid this brand. It’s not to say that all coil-overs are inferior. There are some European brands I’ve not tried and there are a couple I’d have liked to have chosen, such as Nitron in the U.K. (which I tried briefly on the Skyline GT-R I built & finally completed last year) which have a fairly good reputation in say, the bike world too. Having driven countless cars & ridden several bikes and knowing that when manufacturers choose a brand to equip their vehicles with, they’re usually of good quality - when I found used Ohlins suspension, it was clear to me this is a brand of proven quality reliability & after sales support & one I’d had good experiences with. A natural choice. I knew that damping with Ohlins would similar in quality to the Integra Type R’s. Best of all, these shocks cost me less than the equivalent of USD $250, delivered, mostly because they weren’t sexy looking coil-overs. There's damping & minimal height/preload adjustment. Good enough for the road. Although it would have been difficult if not impossible to find the actual spring rates and lengths for the Mugen springs, so many years after this set had been discontinued, I knew with some certainty they’d fit an EF8 & be sensibly specified for road use. Rates would be unlikely to be too track biased (where spring rates would be higher for faster bump & cornering speeds + heavier braking). Again - being inexpensive, I reasoned I could always change up at a later date if it turned out the suspension I was putting together were found to be wanting. I reasoned that I could always re-sell if I chose to upgrade later. Thereafter, I continued to research into other suspension components and replacement assemblies still available on the market, in Japan, Europe and the U.S.
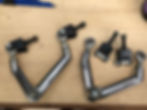
I replaced the entire rear lower arm assemblies with an early model DC2 Type R’s set, simply because it was the easiest way to have hubs with 4H 114.3 sizing. They came ready-fitted with the said (lightly) used set of Nagisa Auto pillow-ball main bushes - ready fitted. I saved money and got the desired solution.

I’d sourced, what to me are the perfect set of rims for an EF8, or possibly any H=Series Honda: A very rare set 16” Mugen MF8’s, which were originally manufactured for Mugen by RAYS. Forged construction, for lower weight, ease of balancing & ultimate strength.

I shod these with inexpensive but decent quality Goodyear REV SPEC sports tyres. To me, tread pattern and block size say a lot about quality. Again, I wasn't hunting for split-second lap time differences, I felt no need to go for say Yokohama Advan AD08R’s, at double the cost.
I tried fitting early DC2 4H 114.3 front hubs but found that would’ve needed some precision machining. Investigation revealed it would be easier to re-drill the original EF8 front hubs and fit new studs, so I completed this work, before pressing in new studs and bearings. With the suspension all taken care of, next, I focussed attention on the brakes. I wanted at least the same spec. as the EK9 / DC2 Type R’s, which already I knew would be up to the task on a road car, without being too expensive.

I’ve learnt over the years that discs which are least likely to warp when keeping to a sensible budget, are those WITHOUT slots & holes drilled into them.
I remember reading Fast Lane Magazine in the U.K. back when I was a kid & learning that Porsche were the original pioneers of drilled rotors with the original 911 Turbo. Those discs had the holes cast into them, meaning they’d expand evenly when used hard and be far less likely to warp. Rotors that are same as OEM, but also, drilled without the requisite casting pattern for rigidity will tend to expand unevenly. I've seen enough warp on track days & such, to consider those to be just “fashion rotors”.
Also, in the event I'd end up warping the chosen discs before they'd get a significant lip on them, replacements would be inexpensive & easy enough to obtain. Needing discs to fit an unusual 4H 114.3 stud fitment, the information wasn’t just a matter of spending a few minutes searching on Google for size, or asking on forums if anybody knew which discs would fit this modified CRX-R.
It took several hours of searching online. Even then I couldn’t be sure till I tried them on the car. Not having a disc manufacturer’s reference book, I persevered and eventually found that the Honda Civic Aerodeck of 1889-01 had 260mm x 10mm non-vented sized rears with the correct 4H 114.3 stud sizing.

For the front, where I needed 282 x 25mm ventilated discs, I found that 1996-2003 Accord discs had the desired stud sizing. When they finally arrived, I found they would fit almost perfectly, needing only a 3mm slip-on universal wheel spacer between the inner face of the disc’s bell and the modified hub, for the calliper to be correctly positioned.
On the rear, I could’ve used EK9 or 98 Spec DC2 callipers, but I'd chosen EP3 ones. Again, because they were cheapest to find used, in Japan.
I’d also bought some used NSX (NA1) front callipers, where I could just as easily have chosen from a Honda Accord, but I wanted that “NSX” Kudos and that “badge engineering". After all, Senna himself had owned a CRX and helped develop the NSX.
Project Mu hoses were put to use and a 1” master cylinder from an EK9 replaced the original, knowing this would provide the pedal feel & travel I was looking for.
The last pieces of the suspension and braking puzzle lay in getting suitably matched stabilizer bars. For the rear, the choice was simple enough. I imported a full (adjustable) kit from the U.S.A of a brand called ASR, which is the best on today’s market, but not available from Japan.
The front would prove more challenging. This was where prior experience on my RX-7 with a little-known Japanese brand came into play: A company called ARC. Not "Abbey Road Corporation" which many of you will be aware make tasty radiators and intercoolers, but a lesser-known company called Auto Refine. They had manufactured a front stabiliser for the EF Civic & CRX SiR models back in the day, which was just as well since I could find no others. It turned out that I wasn’t the only one to know when one finally surfaced: I had stiff competition and paid more than brand new stabilisers for other cars are available for, but I just kept pressing the button until that late-night Yahoo auction ended.
Not having an uprated stabilizer at the front would've likely caused handling imbalance. Possibly pre-mature oversteer where the rear inside wheel would likely have lifted whilst the front end would yaw. Not the desired effect!
Being dedicated to making the CRX-R as close as possible to an OEM Type R would've been, I wasn’t keen on welding two front original ARB’s together, or worse - using hose clamps to join two together, as I've read some have done on forums or FaceBook groups.
I left the original 3.0 quick rack in place, although I did also source a 2.8 lock-to-lock Quaife rack & pinion whilst a limited run was commissioned by Tegiwa. I’m just keeping it stored away for now, but intend to replace in that other EF Civic’s rack suitably converted, so the EF will receive this CR-X’s, to become of full “SiR” original mechanical spec. So the CRX-R's steering will become marginally faster in its steering than original spec. For another time.

There was nothing wrong with the original CRX's B16A engine, so it was carefully prepared & put into storage for the intended EF Honda Civic SiR project.
Fitting the engine was the easy part. But before this could take place, finding rare parts to enhance the engine, which had long since been discontinued, was relatively time-consuming.
Perhaps this is the happy equivalent of retail therapy for us petrol heads.
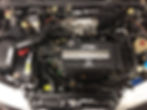
Genuine Mugen parts are treasure & so I waited patiently until a Mugen B16B fitment 4-1 manifold came onto the market in decent condition and pounced on it. The original catalyst would've been restrictive. Having the original from the DC2 sitting there unused, the choice was ready-made.

A Fujitsubo RM-01A exhaust would give the right amount of additional back-pressure without adding too much weight, whilst keeping decibels to sensible levels.
A long-discontinued HKS Intake kit was bought used, only for the single-piece shaped aluminium pipe. A more recent HKS mushroom assembly replaced the original, using a new red foam filter.
I’d have liked to adopt a more glorious-sounding Mugen or a Gruppe M intake system similar to the Integra’s, but alas, space is at a higher premium in the CRX-R’s bay.
The EK4’s intake plenum was changed for a DC2 Type R’s; exactly the same as an EK9’s.
There was a small challenge modifying the engine wiring to mate with OBD0 sensor locations on the original OBD0 harness with the OBD1 ECU, but I managed to find an adaptor harness for the ECU in the U.K., from Hond-R.
Once it was fitted together, on the first attempt the car started. There were a couple of fault codes but Maz, who was at the time still working at Hond-R, was super helpful in advising over the phone. Within 30 minutes, using a multi-tester, we had it sussed. Turned out to be just a bad contact at the fuse box, in the engine bay.
Before finishing assembly of the engine into its location, I’d also rebuilt the gearbox, employing a Synchrotech kit similar to that I’d fitted to the Integra Type R. Like the Integra, this went in, complete with a Toda Chromoly lightweight flywheel and new Cusco copper mix clutch kit. Many people in the U.K. and elsewhere change to a hydraulic clutch system, with a gearbox from, say an Integra or Civic Type R. The ratios are well-spaced in the Y1 gearbox & mine included an original option Torsen LSD, so keeping it was the logical choice. Whilst reassembling, I fitted brand-new strengthened driveshafts too, having learnt from experiences of endurance racing, that they are weak points on most FWD Hondas.

I’ve observed in other projects seen online, that modified Civics and CR-X’s often lose their air conditioning and power steering, especially on bigger capacity conversions. A Glass-top CR-X becomes something resembling a greenhouse in the summer. Being into my 50’s, whilst intending to keep using this car for decades yet, I knew I wouldn’t want to drive without being comfortable and my wife would never want to join me either.

So I kept the original power steering and also cleaned, rebuilt, or replaced air conditioning components in the engine bay almost in entirety. Most difficult was in replacing the dryer, whose silica gel tends to turn to powder with age, then contaminate the R12a replacement refrigerant gas and predictably block the expansion valve located in the cooling box under the dashboard, behind the glovebox. I tried 3 new replacements, but they were all wrong, so in the end, the original was cut open, new Silica Gel put inside, then welded shut again. A suitable replacement expansion valve was found & fitted. I replaced all the o’ rings and condenser matrix for good measure too.
Whilst I was replacing the condenser, I'd also replaced the radiator with a full-sized Tegiwa oversized aluminium item. I used a SPAL electric slimline fan for cooling, which even with the air conditioning piping running behind the now fattened radiator, afforded just enough clearance from the Mugen headers. To keep engine temperatures cooler, I added a lower temp Mugen thermostat & fan thermo-switch, as well as oil filler and (1.3 bar) radiator caps.
The only silicone hose set I could find was from China, but being just inexpensive silicone hoses, I took the chance and ordered a set in black. They fitted surprisingly well and have subsequently given no dramas at all.
I already knew that having been recently professionally rebuilt before coming into my hands, the engine gaskets & seals had all been replaced, but as these engines tend to naturally burn a little oil, I fitted a closed system oil catch tank, using a kit from “42 Draft Designs”. Usually employed by VW & Audi enthusiasts, these kits are of excellent design & build quality and even come complete with a brass drain tap & a cute little dip-stick. To this day I’ve never had to empty it, as no oil even shows on the little dipstick. Good to know blowby is minimal and the rings are good.

All that remained to do mechanically once everything had been assembled and checked over, was to set up the geometry. I did this in the workshop at home, using a simple, but effective Nagisa Auto kit which allows for accurate measurement of camber, caster and toe, both front and rear.
I have the final settings recorded somewhere. Essentially, I set very slight toe-in at the rear with around 1 degree of camber and at the front close to 1.75 degrees of camber with just a smidge of toe out. Next to nothing, really. Everybody seems to choose differently; there are no right settings unless following Honda's guidelines which are conservative.
If you've enjoyed this blog post, please subscribe below - to be informed of future updates. Author: Miguel Varella-Cid
Founder & Director of Newera Imports.
